

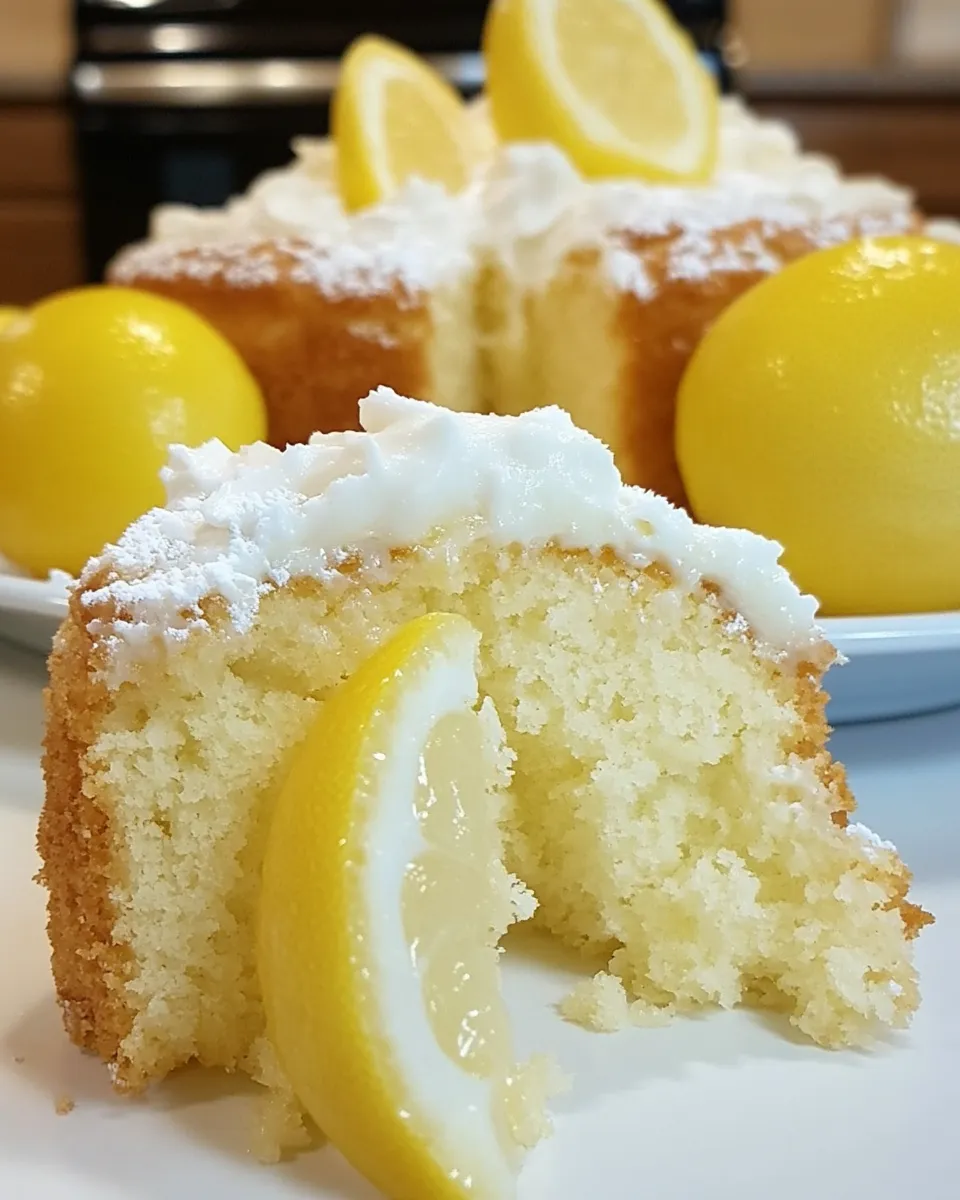
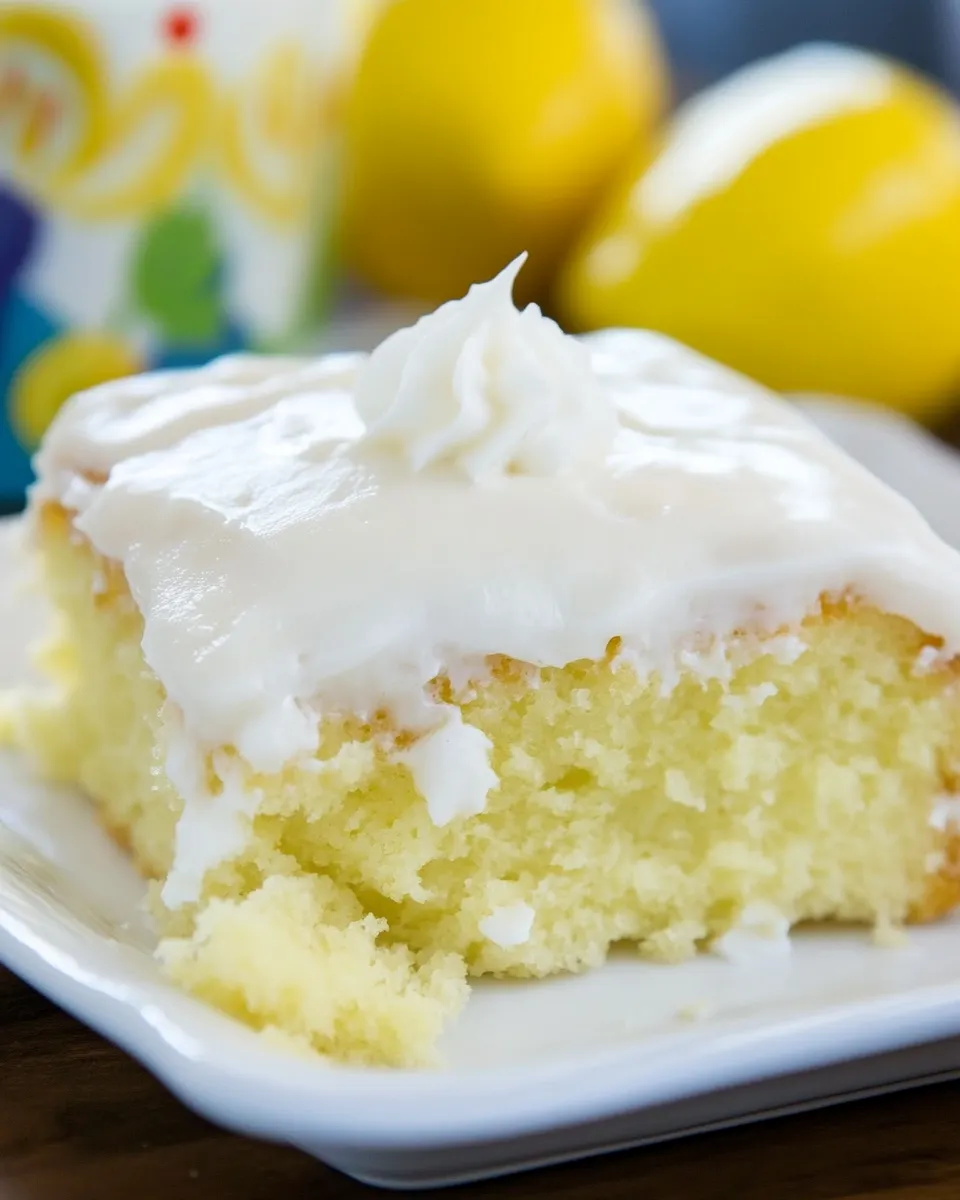
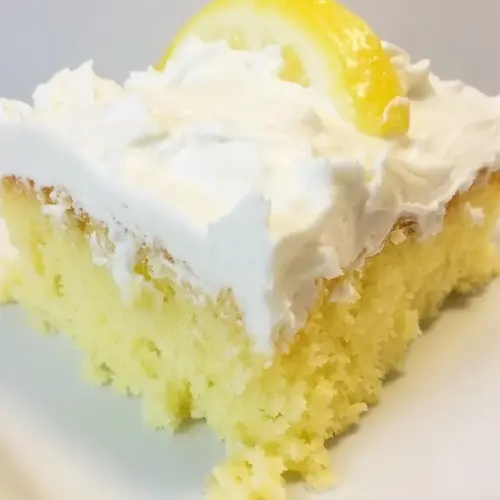
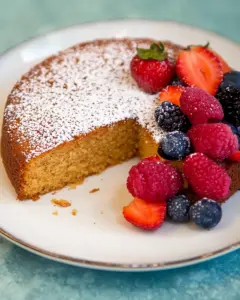
There’s something utterly delightful about a slice of 7-Up Cake. This retro favorite combines the zesty brightness of lemon with the lightness of a fluffy cake, all enhanced by the effervescence of 7-Up or Sprite. Perfect for gatherings or a cozy family dessert, this cake is not only easy to make but also promises to be a showstopper on any table. The unique combination of ingredients provides an unforgettable flavor that will leave your guests asking for seconds. Let’s dive into the recipe and discover what makes this cake so special!
On this page
What Sets This Recipe Apart
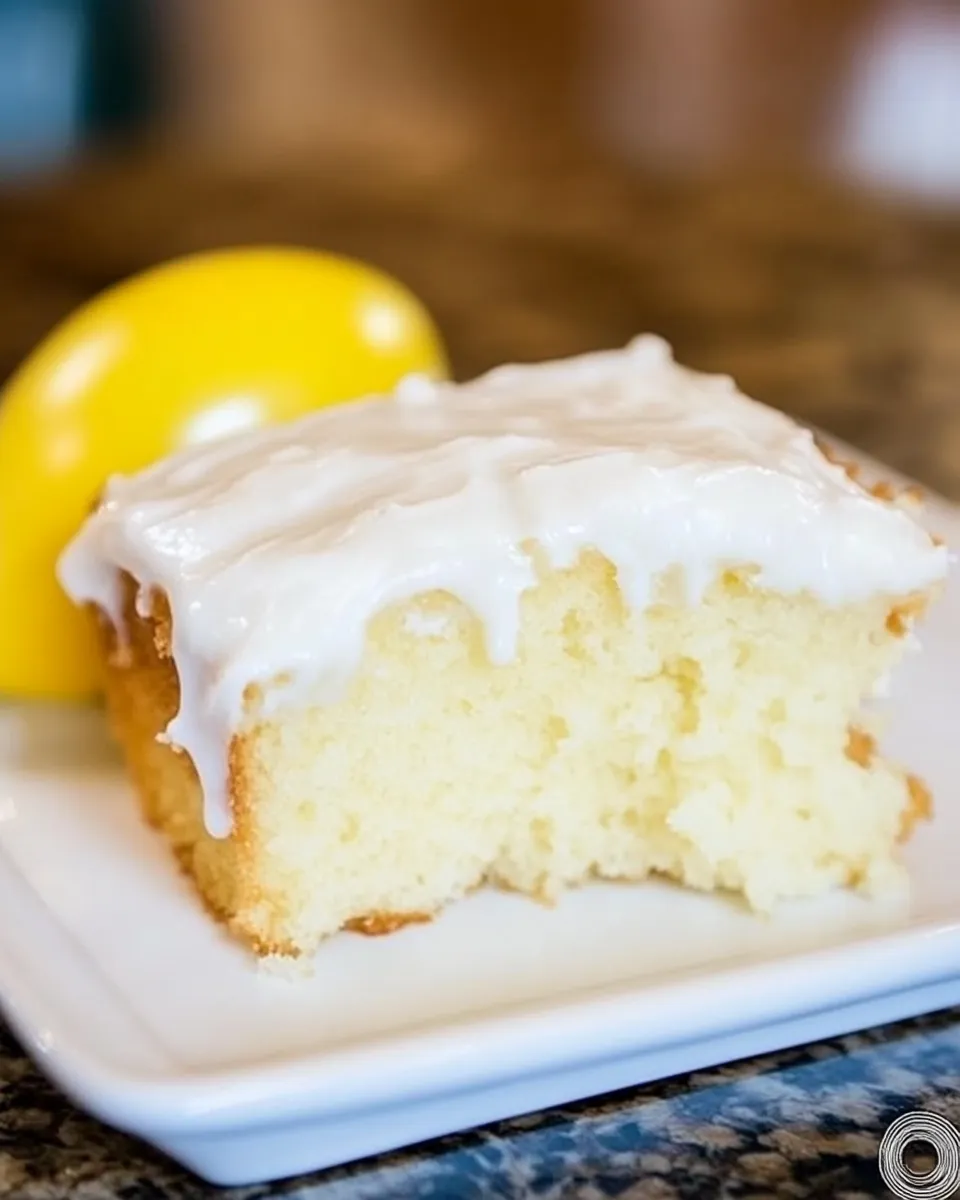
What makes 7-Up Cake truly unique is its use of soda as a leavening agent. The carbonation in 7-Up or Sprite adds a lightness to the cake that you won’t find in traditional recipes. Additionally, the lemon zest and juice infuse it with a refreshing citrus flavor, making it perfect for warm weather or any festive occasion. The combination of butter and vegetable shortening gives it a moist texture, while the sweet glaze adds a beautiful finish.
The Essentials
To whip up a delicious 7-Up Cake, you’ll need the following ingredients:
- 3 cups all-purpose flour – The backbone of your cake, providing structure.
- 1/2 teaspoon salt – Enhances the flavors and balances the sweetness.
- 3/4 cup 7-Up or Sprite – Adds moisture and a unique flavor.
- 5 large eggs, room temperature – Bind the ingredients together for a fluffy texture.
- 2 teaspoons grated lemon zest – Adds a burst of fresh lemon flavor.
- 1 teaspoon vanilla extract – Enhances the overall taste of the cake.
- 1 cup unsalted butter, softened – Creates a rich and creamy texture.
- 1/2 cup vegetable shortening – Contributes to moistness and tenderness.
- 3 cups granulated sugar – Sweetens the cake and helps with browning.
- 1 cup powdered sugar – For the sweet glaze that tops the cake.
- 2 tablespoons lemon juice – Brightens the flavor of the glaze.
- 1 teaspoon milk – Helps adjust the consistency of the glaze.
Tools & Equipment Needed
To successfully make a 7-Up Cake, gather the following tools:
- Mixing bowls – For combining your ingredients.
- Electric mixer – Makes beating the butter and sugar a breeze.
- Measuring cups and spoons – Essential for accuracy in baking.
- Spatula – Useful for folding in ingredients and scraping the bowl.
- Bundt pan – Ideal for achieving that classic 7-Up Cake shape.
- Cooling rack – Allows the cake to cool evenly after baking.
How to Prepare 7-Up Cake
Follow these simple steps to create your delicious 7-Up Cake:
Step 1: Preheat Your Oven
Preheat your oven to 325°F (163°C). Grease your bundt pan with butter or a non-stick spray to prevent sticking.
Step 2: Mix Dry Ingredients
In a medium bowl, whisk together the all-purpose flour and salt. Set aside.
Step 3: Cream Butter and Sugar
In a large mixing bowl, use an electric mixer to cream together the softened butter, vegetable shortening, and granulated sugar until the mixture is light and fluffy. This usually takes about 4-5 minutes.
Step 4: Add Eggs and Flavors
Add the eggs one at a time, mixing well after each addition. Then stir in the grated lemon zest and vanilla extract until well combined.
Step 5: Combine Wet and Dry Ingredients
Gradually add the flour mixture to the butter mixture, alternating with the 7-Up or Sprite. Start and end with the flour mixture. Mix until just combined. Be careful not to overmix, as this can result in a dense cake.
Step 6: Bake the Cake
Pour the batter into the prepared bundt pan and smooth the top. Bake in the preheated oven for about 55-60 minutes, or until a toothpick inserted into the center comes out clean.
Step 7: Cool the Cake
Once baked, remove the cake from the oven and allow it to cool in the pan for about 10 minutes. Then, gently invert the cake onto a cooling rack to cool completely.
Step 8: Prepare the Glaze
While the cake is cooling, prepare the glaze by whisking together the powdered sugar, lemon juice, and a teaspoon of milk until smooth. Adjust the consistency if necessary by adding more milk or powdered sugar.
Step 9: Glaze the Cake
Once the cake has completely cooled, drizzle the glaze over the top, allowing it to drizzle down the sides.
In-Season Swaps
If you want to give your 7-Up Cake a twist depending on the season, consider these swaps:
- In winter, add a teaspoon of ground cinnamon or nutmeg for a warm spice flavor.
- In spring, swap the lemon zest for orange zest for a different citrus note.
- In summer, incorporate fresh berries into the batter for a fruity burst.
- In fall, add chopped apples or pears for a seasonal touch.
What Could Go Wrong
While making 7-Up Cake is straightforward, here are a few common pitfalls to avoid:
- Overmixing the batter – This can lead to a dense cake. Mix until just combined.
- Not using room temperature ingredients – Cold eggs or butter can lead to uneven mixing.
- Incorrect oven temperature – Ensure your oven is properly calibrated to avoid under or overbaking.
- Skipping the cooling step – Letting the cake cool too quickly can cause it to break apart.
Best Ways to Store
To keep your 7-Up Cake fresh and delicious, consider the following storage tips:
Store the cake in an airtight container at room temperature for up to 3 days. For longer storage, wrap the cake tightly in plastic wrap and then in aluminum foil before placing it in the freezer. It will keep well for up to 3 months. When ready to enjoy, thaw at room temperature and re-glaze if desired.
7-Up Cake FAQs
Can I use a different type of soda?
Absolutely! While 7-Up or Sprite are traditional choices, you can experiment with other lemon-lime sodas or even ginger ale for a unique flavor.
What can I do if my cake is too dense?
If your cake turns out dense, it may be due to overmixing or using cold ingredients. Make sure to combine the wet and dry ingredients just until mixed and use room temperature eggs and butter.
Can I make this cake ahead of time?
Yes! You can prepare the cake a day in advance. Just store it in an airtight container and glaze it right before serving for the best presentation.
How do I know when the cake is done baking?
The cake is done when a toothpick inserted into the center comes out clean or with a few moist crumbs. If it has wet batter on it, give it a few more minutes in the oven.
In Closing
The 7-Up Cake is a delightful treat that encapsulates the joy of baking and sharing. Its fluffy texture, refreshing flavor, and unique history make it a beloved recipe in many households. Whether you’re celebrating a special occasion or simply craving something sweet, this cake is sure to please. So gather your ingredients, follow the steps, and enjoy the process of creating a cake that will undoubtedly become a favorite in your home. Happy baking!
7-Up Cake
Ingredients
For the Cake:
- 3 cups all-purpose flour
- 1/2 teaspoon salt
- 3/4 cup 7-Up or Sprite
- 5 large eggs room temperature
- 2 teaspoons grated lemon zest
- 1 teaspoon vanilla extract
- 1 cup unsalted butter softened
- 1/2 cup vegetable shortening
- 3 cups granulated sugar
For the Glaze:
- 1 cup powdered sugar
- 2 tablespoons lemon juice
- 1 teaspoon milk
Instructions
- Step 1: Preheat Your Oven. Preheat your oven to 325°F (163°C). Grease your bundt pan with butter or a non-stick spray to prevent sticking.
- Step 2: Mix Dry Ingredients. In a medium bowl, whisk together the all-purpose flour and salt. Set aside.
- Step 3: Cream Butter and Sugar. In a large mixing bowl, use an electric mixer to cream together the softened butter, vegetable shortening, and granulated sugar until light and fluffy, about 4-5 minutes.
- Step 4: Add Eggs and Flavors. Add the eggs one at a time, mixing well after each addition. Stir in the grated lemon zest and vanilla extract until well combined.
- Step 5: Combine Wet and Dry Ingredients. Gradually add the flour mixture to the butter mixture, alternating with the 7-Up or Sprite. Start and end with the flour mixture. Mix until just combined.
- Step 6: Bake the Cake. Pour the batter into the prepared bundt pan and smooth the top. Bake in the preheated oven for about 55-60 minutes, or until a toothpick inserted comes out clean.
- Step 7: Cool the Cake. Once baked, remove the cake from the oven and allow it to cool in the pan for about 10 minutes. Then, gently invert the cake onto a cooling rack to cool completely.
- Step 8: Prepare the Glaze. While the cake is cooling, whisk together the powdered sugar, lemon juice, and milk until smooth. Adjust the consistency if necessary.
- Step 9: Glaze the Cake. Once the cake is completely cooled, drizzle the glaze over the top, allowing it to drip down the sides.
Equipment
- Mixing bowls
- Electric mixer
- Measuring cups and spoons
- Spatula
- Bundt pan
- Cooling rack
Notes
- Store the cake in an airtight container at room temperature for up to 3 days.
- For longer storage, wrap the cake tightly in plastic wrap and aluminum foil before freezing.
- Thaw at room temperature and re-glaze if desired before serving.


Leave a Reply